Monday, March 14, 2011

Kaleidoscope Shawl

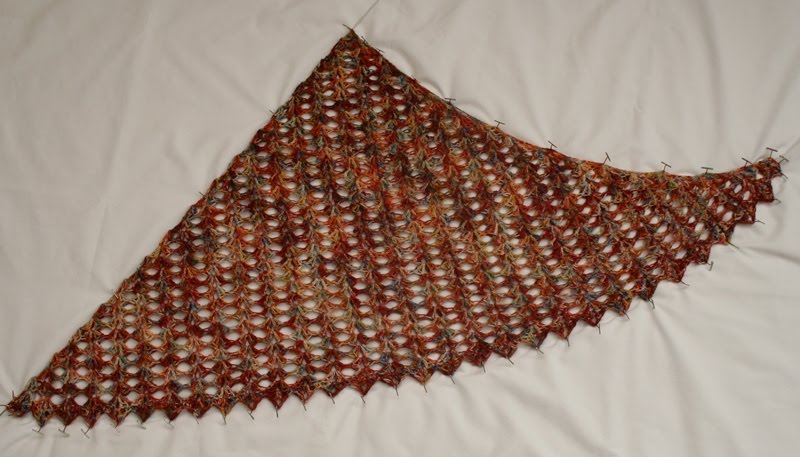
I recently acquired a gorgeous ball of color...


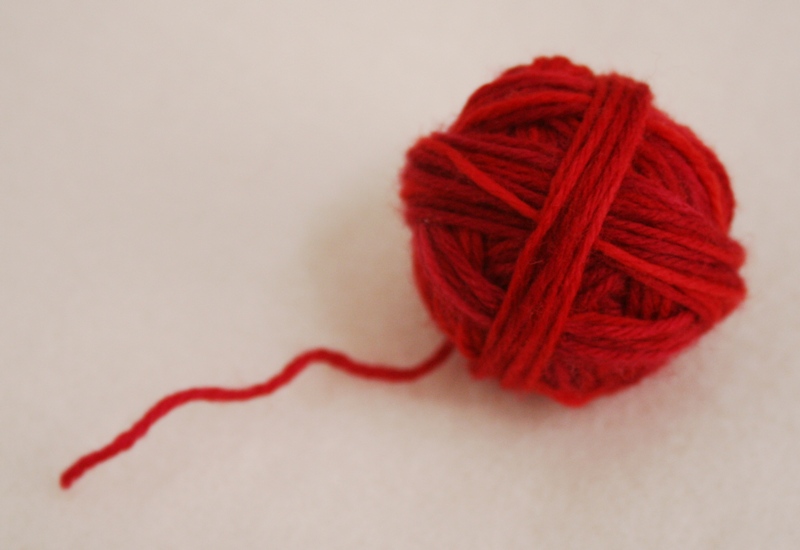
It's "Punta Yarns Merisock Hand Painted". There were 463 yards in the skein and I tried to use every inch that I could. This little ball is all that is left from the Lily Chin "Mock Faroese Shawl" that I finished a couple of weeks ago...


I tried a few different crochet hook sizes and decided on an "I". It made the stitches full and not stringy but left them loose enough to block out and look lacey. Here it is before blocking...


The top really wanted to curve so I went with it. That meant that my foldover-down-the-center technique would work best to keep it symmetrical. I folded it down the center, placed a blocking wire in the fold and used pins to secure it...


Next, I gently stretched it out, being careful to keep points and rows together, shaped it, pinned it, and let it dry...


It has a pretty shape...


The small amount of yardage and this pattern limited the size but it turned out to be a nice small shawlette...


Drapey and lacey...


It'll make a perfect accent to an outfit and a nice splash of color...


The colors...I just can't get enough of them...


Red, orange, yellow, blue, green, purple, brown...


So pretty!...

Saturday, March 12, 2011

Growing Collection

My collection of transferware is growing! I found a two plates and a cup a couple of months ago. Yesterday, I visited one of my favorite little antique shops and found two more...

This one is small but so pretty. I think it's old too...


Here's the back of it...


I like botanical patterns the best and have avoided designs with buildings, people or scenes...until now. I couldn't resist this one because it's so cute. I love the cow, the sheep, the black sheep, more sheep in the background and, of course, all of the flowers around the edge. This plate is a reproduction of a pattern called, "Milk Maid" which was first introduced in 1814. It even came with a plate hanger already on it...


This is another reproduction that I found a few weeks ago at a discount store. The center of the plate is similar to an antique one that I already have but the pattern around the edge is different...


I'd love it if all of my plates were old but transferware has become a challenge to find. So, when I find a plate that I like and it's in a color I like, especially red, I get it! I think I have enough now to hang a nice grouping on the wall.

I'm still considering a large antique transferware pitcher that I saw yesterday. It's gorgeous but it's $38 (not too bad). Hmmm???

Thursday, March 10, 2011

Bye Bye Birdies

I like birds. And, I like the trim around the windows of our house. After we moved into our current home (about eight years ago) we realized that pigeons also like the trim around our windows. That's NOT good! They're very messy! We've been trying ever since to keep them off. Our most successful solution has been to hang netting (fine landscape netting that barely shows) from the eaves to just below the top of the windows (the pigeons only seem to like the tops of the windows on the second story). Other than a few times that the netting has fallen and hubby had to re-hang it, it's worked pretty well. Problem solved, right? Well...maybe not.

We recently started seeing little white balls of foam on the ground on one side of our house. At first, we had no idea what it was...


We kept seeing more and more of it and one day when I was out there I noticed a few pieces falling from the sky. I looked up and quickly realized what it was. Before we were successful in keeping the pigeons off of the trim ledges, they must have scratched off some of the stucco. Even though the pigeons can't go up there anymore because of the netting, the sparrows can and missing stucco makes it possible for them to pick into the foam underneath. They not only picked, they dug tunnels! I saw one fly out of a hole! Argh!

We had to do something and we had to do it quick! We made a trip to Lowe's and bought a really long ladder (not cheap but it's 20 feet to the eaves!), foam to fill up the tunnels and holes, a long slat of aluminum to cover the top of the trim and prevent further damage, and some spikes to keep birds off.

After lots of fiddling and adjusting of the ladder, we finally got it in a good spot, at a good angle, and hubby felt pretty safe. It's really high up there! He sprayed foam into the holes.


While it dried, he drilled holes into the aluminum slat and attached bird spikes with stainless steel wire. The aluminum will protect the top of the window and cover the holes. Attaching the spikes to the one slat also allowed him to attach all six feet at once (they come in 12" sections).


If this doesn't work, I don't know what we'll do!


He had to trim some of the spikes to make them fit around the eaves. And, it was a challenge to put it up there. It's not pretty and some of the foam and damage shows but, hopefully, it will work.


Now that we've figured out how to get the spikes onto the ledge, the other windows should be a little easier. They'll be cheaper too because we now have a big ladder. Who knew little sparrows could be destructive and expensive?! Certainly not us! We'll be working on more windows this weekend. Then, it'll be time to call the window washers!

Wednesday, March 9, 2011

Fresh Baked

My husband likes to bake bread from time to time and my daughter recently had a craving for stromboli. That works out perfectly for both of them. Hubby made some bread dough and used half for a loaf of bread...


My daughter used the other half to make stromboli. She rolled out the dough, layered on Salchichon, Jamon Serrano and Chorizo Cantimpalo (three spanish meats from Trader Joe's - kind of like salami and prosciutto) and spinach and she made slices on the two sides...


She braided the slices over the top...


Then, she brushed on a mixture she had made on the stove. I think it had olive oil, garlic, basil and some spices...


It was lookin' good as it went into the oven...


The baking bread and stromboli made the house smell wonderful! Mmmm...golden brown...


All done!


She made some sauce to dip it in. I think it had olive oil, green chilis, chili powder, garlic and some mayo, among other things. It was really good!


Delicious!


Hubby's bread was really good too. He tried a new recipe and it was the fluffiest loaf he'd ever made. There's nothing like fresh baked bread...whether it's a loaf or made into stromboli...Mmmmmm!

Tuesday, March 8, 2011

Adventures in Clay

I've always wanted to try my hand at ceramics but just never got around to it...until now. My daughter took a ceramics class at the local college last semester and had a lot of fun. She decided to take it again and asked me to take it with her. How could I pass up the opportunity to spend time with my daughter, have fun, and try something I've thought about doing for decades?!

It's a lot of fun but I'm learning that ceramics isn't quite as easy as I had thought and that's causing me to appreciate even the simplest of items. I'm also learning that the outcome of ceramics projects aren't always predictable but it kind of adds to the fun. My first project is a perfect example of that. We were asked to make a fruit or vegetable. I chose a pear. It was made with two cup type halves that I put together in the center and then sculpted into a hollow pear shape. It has a hole at the top for a stem (which I still need to add) and a hole at the bottom to release steam and prevent it from exploding when it's fired. After I was done with the sculpting, it was left to dry and then bisque fired to finish drying it and make it hard. I then painted a raku glaze on it and it was fired at a higher temperature (high fire). Then, the fun began!

At the start of class some projects were set into a kiln and fired for about an hour...they became glowing orange hot. At that time, with gloves and long tongs, we each carefully lifted our project out and lowered it into a bucket of newspaper and closed the lid as it caught fire. The projects sat and smoldered for an hour or so and then we carefully took them out and cooled them with water (we had to hurry the process because of the short class time). Then, it was time for a good scrubbing to clean off the black soot.

There is some control at the raku stage in that if we use a metalic glaze and put it into the can as quick as possible and shut the lid to reduce the oxygen (reduction) we get more of a metalic look. If it's held it out for a few seconds before reducing the oxygen, you get less metalic and more color. I used a green/copper glaze and held my pear in the air for a few seconds to get some green color before placing it into the bucket for a little copper blush. However, when all was said and done, I realized that I must have used the wrong glaze because my pear is white! I like it though. I think it turned out pretty...


The copper blush is right where I had hoped it would be. How lucky is that?! I still need to add a stem. I think I'll make it black to go with the black on the pear.


I didn't expect all of the black splotches and cracks but I like it.


Here's a close up of the side with copper and the most color and pattern.


Our next assignment was to make three plates using rolled out slabs of clay. I made my first one with leaves and berries. For this project we used colored slip (watered down clay and minerals) to paint on color. There wasn't a red for the berries so I used the next best thing a dark pink/burgandy (or it was supposed to be after firing). Here it is before the first firing...


After firing, glazing and firing again, the berries ended up blue. Hmmmm? And, the many layers of white turned out splotchy. Like I said, this is very unpredictable!


I do like it though. I think the leaves and berries look pretty good.


My second plate had a few surprises too. First, I took the coil out from under the edge a little too soon and parts of the edge drooped. I like the design and the yellow color though.


After the first firing, it had a dark gray/green splotch on one side. I was told that it might go away after the glazing and the second firing. Instead, the whole thing turned gray and really splotchy!


I still like the pattern but I'm not sure I love this plate.


I have one more plate that's undergoing it's first firing this week. I'll post a picture when it's done. I'm also working on a birdhouse that I'm hoping to raku. I can't wait to see how it turns out! This is fun! :-D

Thursday, March 3, 2011

Thoughtful Thursday

I'm still here! In fact, I check my blog everyday and read blogs that I like to follow. I even have things I want to blog about. But, I've just been too busy to plan out the posts, take pictures, and spend the time putting it all together. What have I been up to? Well...

I'm taking a ceramics class with my daughter at the local college. That's taking up a couple nights a week along with a little homework time. My daughter took this class last semester and had a lot of fun. She wanted me to take it with her this semester. In fact, she practically begged me to do it. How cool is that? I couldn't pass that up. Not many kids want their moms to take a class with them. It's a great opportunity to spend time with her, have fun, and make memories. Some of my first projects are starting to come out of the kiln and I plan to post some pictures soon.

I've been deep into Spring cleaning. Actually, my husband and daughter have been too. We've been getting rid of stuff that we just don't use, need or want. We've been filling the trash can and taking loads of stuff to donate. It's surprising to have so much going out because we thought we were keeping up on this kind of thing. We take stuff to donate every couple of months or so. Simplifying and cleaning even more feels great! Hubby built some storage into my daughter's walk-in closet and we're making plans for some other home improvement projects too.

The tendonitis in my elbows is doing soooo much better. The physical therapy and time have made a world of difference and I'm doing things I haven't been able to do in a couple of years! It's so exciting! I've been riding my mountain bike again and not just on dirt roads but on rocky, technical trails! Yeeha! All the time off my bike and not being able to do it make it even more fun now that ever. I also went skiing last week! Pretty cool because last winter I couldn't even hold a ski pole! I forgot how much I love to ski! It was one of my best ski days ever! We're planning to go again very soon! I can't wait!

I've been doing very little in the way of knitting, crochet or any other crafty pursuits. It's not for lack of trying. I've tried several patterns that just don't seem to work. And, I've spent a lot of time lately trying to match patterns to stash yarn. That often feels like an impossible task! I did find a pattern and yarn match late one evening that I really liked but didn't have the right size of circular needle to start it. Ugh! The next day I decided I really needed to start on a baby gift instead. So, I'm working on a little sleep sack and hat set now. I'm not sure if I'll get it done in time though...the baby shower is this Saturday! Oh...and I did get out that problem vest project and I've worked on it a little. I really need more hours in the day!

Well, I'd better end this and get started with my day. I have a dog to walk, a load of stuff to donate and a baby gift to knit, among other things. Thanks for stopping by. Have a wonderful weekend! :-)

Saturday, February 26, 2011

So Close...


But...so far!


I only had a few more stitches to go on this shawl to complete the final row but there's just not enough yarn to make it to the end. I had to rip out the row and now I have yet another tiny ball of leftover yarn.


I know...I said I was going to work on finishing my vest and lacey socks. I haven't forgotten. Really! I guess I'm just practicing my avoidance skills. This is only the second shawl I've made in the past couple of weeks. Oh yeah...and then there was a pair of socks...and the sheep bowl. And, now, I need to block my new shawls. Hmmmm?! Maybe I need more practice with focus than avoidance! Ugh! Ok...I'll go get my vest project out. I hope another ball of yarn, a pattern, and a hook or needles don't grab me first! ;-)

Wednesday, February 9, 2011

Baa Baa Bowl Sheep

I'm on a mission to complete projects that have been sitting in time out. I finished a pair of socks earlier this week. Today, I finished needle felting sheep onto a knitted and felted bowl that I made months ago. I originally blogged about it HERE.

The bowl...


One sheep...


Two sheep...


Three sheep...


It's done and that feels good. However, I can't say that I love it. I really think the green should have been greener (the blue is bluer in real life). And, now that it's done, I'm not sure what I will do with it. But, it's one less thing on my to-do list. Now, it's back to the shawl I blogged about yesterday and deciding what to do with it or the troublesome vest or those started-long-ago Pomatomus socks. Hmmmm?

Tuesday, February 8, 2011

Help!

I just don't think I can take it anymore! I started knitting the "Gabriel's Wings" shawl over a year ago and it's still not done! HERE is the original post. It's been in time-out many times because it's just NO FUN! I've made silly mistakes on it, gotten confused as to where I was/am, and this project is just plain boring. I'm attempting to finish up projects that have been sitting around. I'm just not sure I can finish this one. I've probably knitted about 2/3 to 3/4 of the yarn ball but that last bit...I just don't know if I can do it! Would it be crazy to rip it all out and use the yarn for a project that's actually FUN?! Have you ever gotten that far on a project and not been able to make yourself finish it? Have you ripped out that much work? I mean...this shawl is pretty...but...

Monday, February 7, 2011

It's a Match!

I recently blogged about a pair of socks I was mindlessly knitting that turned out to be horribly mismatched. The mismatch wouldn't have shown from under my jeans and no one would have cared...except for me. So, I ripped the second sock out and started again. You can read about that HERE.

When I knit socks, I would normally find the start of one of the colors and cast on. That way, I could later find the start of that same color to cast on the second sock and have a matched pair. Since I didn't do that this time, I had to come up with a solution and hope it worked. Luckily, it did. I now own a brand new, perfectly matched pair of socks!


To restart my second sock, I pulled yarn from the ball until I found a brown section like the one near the top of the first sock. From that spot, I wrapped yarn around one of my needles (going backward from the brown) 48 times (the number of stitches I needed to cast on). Next, I took that length of yarn and measured seven lengths (the number of rows above the brown stripe on the first sock and still measuring backward from the brown) and cast on with the seventh length. I felt pretty confident that this would work but I didn't imagine it would work this well. The stripes are perfectly matched!


If I had paid better attention, I could have made longer socks. It turns out that I only used half the ball of yarn. That means I have enough yarn left over to make another short pair.

I really should learn how to knit socks from the toe up! That way, I could divide a ball of sock yarn in half and get the maximum use from it...and longer socks too!