Wednesday, November 14, 2018

Decorating Bravery and Using What You Have

I've long had the problem of worrying what others will think or judge about how I decorate home.  I've worried to the point of not doing much of anything.  Crazy, huh?!  I also hesitate because I don't want to fail and end up with results I don't like.  Well, I recently tried to stop worrying and started to just go for it.  It can be hard because I find myself going back and forth in my mind between trying not to worry and thinking of what's "in" and trying to figure out what I'd really like to do in my own home.  I'm hoping it'll get easier with practice.

One brave move I made was to finally hang my red plates.

I love transferware!  I've been slowly collecting it over the years.  I initially fell in love with blue ones.  However, when I started collecting them I found myself loving the red/cranberry color too.  So, my collection of those two colors began to grow.  I hung a few on the walls years ago but a collection of the red ones grew and just sat stored away because I just couldn't figure out where to put them.  They don't exactly go with the colors in our home.  Red is one of the colors we have in our decor but it's not quite the cranberry red in transferware.

  There was some space in our dining room for them.  And, I noticed that the cute little noses on this bunny painting we have just happen to match the plates perfectly.  I played around with the arrangement for a few weeks but didn't want to commit out of fear it might not look good and it didn't  perfectly match the rest of the house.  Finally, one day, I just made myself go for it.  I made a decision on a layout and began pounding nails into the wall one by one until I had this....


I absolutely love it!  I often sit on the side of the table facing it just so I can stare at it.  It's so pretty!  And, no, it's not the right red but the painting across the room has some of this color in it along with the red-red that's in other parts of the house.  That sort of ties it together.  And, I think that's good enough!  Especially since I love this so much!  

This is also a great example of use-what-you-have to decorate.  I imagine I'm not the only one that has things tucked away here and there that aren't being used.  Or, things that can be arranged differently or in a whole new way or area.  I've been noticing this past year or so that I often think of something I'd like to get or an area I'd like to decorate and find that I already have something that will work.  It's such a great feeling!  Not to mention a great money saver!  

Sometimes it's something that may work out great until I find something to replace it or make it even better.  This photo is a good example of that.  The dresser isn't exactly what I want for our dining room.  I'd prefer a buffet or hutch of some kind (which I had something closer to that idea but it works better in our craft studio for now).  However, I just haven't found what I want yet and I'm a budget shopper which means it may take even longer to find.  So, for now, the dresser will work.  

The Pepsi box is another example of using what we have.  I'd been watching for a nice wood tray for a bar but never found one I loved.  We had found this box at an antique sale and it worked great for our bar.  So, that's how we're using it.  It's not quite big enough but we can at least keep our most used spirits in there.

How do you approach decorating?  Are you fearful of what others will think to the point of not doing much decorating?  Does fear of it not working out make you hesitate?  Do you decorate with what's currently in style?  Or, are you brave and bold and just go for it and do your own thing?  Are you budget minded and go to thrift shops, yard sales, and antique stores?  Have you found joy in using things you already have?  Have you always approached it in one of those ways or changed over time?  Our homes are ours and we should enjoy them in that way....as a reflection of us and who lives there.  Although, it's not always easy.  I'd love to hear your thoughts!

Friday, November 2, 2018

Halloween Fun!

It had been years and years since I dressed up for Halloween.  I finally did this year and it was so much fun!  I dressesd up as a witch.  Of course, I had to get pictures.  I seem to take pictures of everything.  But, before I got a picture of my whole costume I had an idea I wanted to try first.  And, it worked!  I'm so excited about this picture...I'm flying!


Here's my whole costume.  It was hard to get it all in one picture with that tall hat.  So, I leaned over to try to get it all.  I made the broom recently.  It's made with a dried rose branch with the thorns removed, some faux flower/grass bouquets from the craft store, jute, a little left over leather for the handle, and a stone glued to the top.  Oh, and a glue gun!  My daughter had this vintage dress that worked and looked so cute for my costume.  However, clothes from those days had such tiny waists that the zipper only went part way even though the top closed.  So, we wrapped me up in black tulle to cover the open area.  It created a bit of a bustle in the back.  That was a fun little bonus.  The hat and socks are from Michael's.  And, those little witchy boots I've had for about 30 years.  I've worn them so much over the years that they've even had repairs and parts replaced.  It's fun when you can create a costume with things you have.  I love how my costume turned out!  


My daughter created hers entirely with things we had...the clothes, boots, and even the crazy wig.  She even painted the t-shirt the night before.  It was a never worn logo shirt hubby had gotten from work and thrown into the rag bin.  I'm amazed at how great she did at painting it!  She's a heavy metal rocker from the 80's.  And, of course, she had to get a pic with her harp.  She's a harpist that does amazing and surprising things with her harp.  Yes, rock, blues, Latin...all kinds of cool music.


We wanted to go somewhere wearing our costumes and decided to share the fun with my mom who is in assisted living with Alzheimer's.  She loved it!  We even brought her a sparkly witch hat.  She laughed so hard that she had tears in her eyes.


I found some Halloween craft kits at Michael's and we brought those for some crafty fun.  She struggled with tthem a bit but had a lot of fun!  She's always been a very crafty and talented person but hadn't crafted in a long time.  We weren't sure how she'd do.  This was a bit of a struggle but it worked.  We'll be doing more crafts with her around Christmas.


We each made two bats.


She thought they'd be fun as earrings.


After that we took them up to her apartment to decorate with them.  Then, we took her to the Halloween party they were having for the residents.  She had a good time and so did we.

It's been a tough year.  In a nutshell, my father had become increasingly ill and weak.  He fell in March, went on Hospice in April, and passed away in May.  Since then I've worked hard to get all of my mom's surivor benefits, and everything else straightened out for her.  It was so much more work and stress than I ever would have imagined.  I've just recently started feeling like me again.  That's due to finally finishing up on a lot of stuff, finally having some time to grieve the loss of my dad, watching some grief videos to figure it all out, and, finally, joining an Alzheimer's support group on Facebook.  I was surprised to find that was even a thing but it has helped me so much!  I don't feel alone in dealing with my mom's Alzheimer's and the things she does.  The support is amazing!  And, it feels so good to support others dealing with the same things.  And, I've gone from dealing with the mom I've been hurt by all these years and the anger of the time she robbed from me and my dad, to taking care of her with love and trying to bring joy into her life as long as we can.  It's a horrible disease!  It's nice to bring her happiness!

I composed a post several months ago about what all had happened with my dad and what we were all going through but it was tough to compose and I just couldn't bring myself to post it.  I'm not sure if I ever will. It feels good to be getting to the other side and feeling better.  It feels good to breathe deeply again and finally feel the stress start to melt away.

I hope you all had a happy Halloween!

Saturday, December 30, 2017

Simple Spiral Cowl Pattern

At the beginning of the year I challenged myself to creating 52 things...equal to one per week.  That seemed simple enough since I'm usually always creating something.  It went well at the beginning of the year but I seemed to have lost my mojo a few months ago and got behind.  Now, with just days left in the year, I'm scrambling to achieve my challenge.  That's where this cowl pattern comes in. 

One evening last week I decided to go through my yarn stash to see if I could find some inspiration.  I pulled out a couple of almost full skeins of Caron Simply Soft yarn that were left over from another project.  I quickly got a pattern idea in my head, selected a crochet hook, and got started.  It turned out so well that I whipped up a second one and had two finished by the next evening.  I think each one only took a couple of hours.  I love how they look and fit.  And, the pattern is super simple and fun to make.

It was unusual to come up with an idea so quickly and for it to work out so well.  Maybe my mojo has been there all along...it just needed a deadline to get going!

I loved the results of this pattern so much that I decided to write a pattern to share.  It's a good thing I did because I quickly started getting requests for one when I posted pictures on Instagram and Facebook.  I hope you all enjoy it.  Please let me know if there are any questions, problems, or things that need to be clarified or changed.  And, let me know what you think.  Thanks!

Simple Spiral Cowl


For this project I used:

Crochet Hook:  Size "J" crochet hook
If you're using a different yarn, adjust the hook size accordingly to get the look and fit you like.

Yarn:  One skein of Caron Simply Soft yarn - 315 yards
You can use any yarn you like.  Just adjust the hook size to match.  The cowl can be made in various sizes from the one shown (using about four ounces of yarn) to a longer version (using the entire skein) which can double as a hood.

Stitches used in this pattern:  Chain, slip stitch, single crochet, and half double crochet

Difficulty: Easy/Beginner

Finished size:  approximately 12" wide by 13"+ long

This pattern is made in a spiral that doesn't have a beginning and end on each round.  It simply works up with two different stitches until it's the desired size or yarn runs out.

Instructions:

Chain 101 (adjust accordingly to the desired size if you use a different yarn).  To make it larger or smaller, add or subtract 10 chain stitches (to get a multiple of 10 plus one).

Being careful not to twist the chain, slip stitch into first chain (to create a circle).  Chain two, *skip the next stitch, half  double crochet in the next stitch, chain one*. Continue with pattern ** to first chain two.  Half double crochet into chain two space, *chain one, skip next stitch, half double crochet into next chain one space*. Continue in pattern ** until cowl is about 13" long or desired length.  Single crochet in next chain one space, chain one, slip stitch in next chain one space. Fasten off, tuck in the ends, and enjoy!

Thursday, August 31, 2017

Thursday - This and That

Just thought I'd do a post about this and that....a few different things going on lately.

It's been a very hot summer here.  So, I've been staying in a lot to avoid the heat.  I haven't accomplished as much as I'd planned due to lack of motivation in this heat and being stuck inside.  But, I have done a few things...

I knitted up a washcloth and scrubbie with some pretty, tan, Sugar N Cream yarn I had.  I love the results of this washcloth pattern.  It's simple but so nice.  It lays very nicely with great edges and corners.  It's the "Copycat Dishcloth" pattern from Ravelry and it's free.  The scrubbie pattern is also free and it's called, "Tribble".  I have a big, glass jar on our master bathroom counter that I have several shades of off-white and beige, hand knit washcloths in along with cotton balls and q-tips.  It's handy and the washcloths look so good in there.  They're very nice to use too.  Soft and pretty!


We bought a long dining room table a while back and I collected some chairs to go with it.  I just finished up some custom cushions for four of them.  I used fabric I got years ago for almost nothing...a whole bolt of it!  I still have lots left.   There are two antique chairs that I need to create cushions for too.  All the chairs will be sanded down and painted black.  I think it's going to look great when it's all done.  We just need cooler weather so we can go out in the garage to work on them.


My dad had a couple doctor appointments yesterday.  One was a bit stressful because he was going to get the results on tests to see if he has lung cancer.  I wanted to be with him for something this big...just in case.  Although, we felt it probably wasn't and we were hoping for the best.  My mom was being her usual, difficult self (Alzheimer's) and wouldn't allow me into the room but we got her to go for letting my daughter in.  I hated for my daughter to be in that position, just in case it was bad news.  But, she wanted to do it to support grandpa and to hear what was going on for my brother and I.  She even recorded it for us.  She's awesome!  Anyway...it was good news...he doesn't have cancer.  He has fluid in his lungs but it's probably due to his heart condition and some of the meds he's on.  Whew!  Afterward, we went out to lunch.  We've been trying to do that about once a week or so.  It's been very nice.

When we got home in the early afternoon, the temp in my car said 113 degrees!  Ugh!  We had a nice surprise shortly after that when it started pouring rain.  It dumped hard and rained for at least half an hour.  It cooled things off and gave the plants nice cool shower that I bet they loved.  My daughter's kitty, Sonora, was a little scared by the rain because it was so loud.  When it calmed down a bit, she enjoyed looking out the window and watching it.  So cute!


I've been meaning to put together a picture-full post to introduce a new (last December) member of our family but I just haven't gotten around to it.  I wanted to put a lot of photos on the post and all my photos are all backed up and I literally have thousands and thousands of photos (not just her) that I'd have to go through to find the greatest ones of her, download them back to my laptop, and then upload to the blog.  A big job!  So, I'll just go ahead and introduce her now.  That way I can continue to post pics and not get further behind on what the intro post would have.  

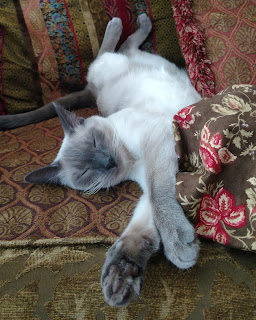
Here she is...our adorable Siamese named, "Sky".  She's my hubby's kitty and she is awesome!  She's so sweet, loving, fun, funny, playful, and she loves being with us almost constantly.  She's adorable!  We love her so much!  Here she is laying next to me while I crocheted one time this week...


It's been a long and difficult adjustment for Penelope to have another cat but she's finally becoming herself again...almost.  Here she is rolling on a rug this morning.  She's actually playing, roaming around the house more, and being loving again.  It's been tough for her and for me to see her not being her wonderful self.  So, it's wonderful to be getting her back.


Sky came over to see what Penelope was up to.  She's not used to seeing Penelope play and be the cat she was.


Our cats are still separated from my daughter's cat as they get to know one another.  Although, my daughter's cat is a very confident cat who's not afraid of much of anything and can be aggressive. So, we're not sure when or if we'll ever let them be together.  For now, they're just getting to know one another through a screen door we put at the hall near my daughter's room.  We don't love having a door there but it keeps the cats safe.  We switch back and forth with who gets to run around the house.  We either let Sonora out for a while while our cats hang out together in our large master bedroom and bathroom.  Or, our cats come out while Sonora gets to stay in her part of the house where my daughter's room, bathroom, hall, and craft room are.  They're very happy wherever they are.  They're all wonderful cats in their own ways.  We love them all so much!

The screen door we used is one we finished up that we'd started when we lived at our old house and had llamas.  All it needed was some color, stain, varnish, assembly, and screen.  Hubby made a frame for it to fit in the arch and ta-da!...a solution for our cat conundrum.


I finished spinning up a ball of roving this week.  I'm letting it sit for a bit before I Navajo ply it.


I've wanted to play a musical instrument for a very long time.  I tried piano lessons a couple times but didn't stick with it.  It was difficult to memorize all the notes and play different things with each hand from the two different lines on the music.  I've been thinking that something with just one line of music would be more practical to start with.  In my search, the ukulele has been suggested several times.  I finally decided to go for it when I found this great ukulele that not only is cute but has a wonderful sound...not so shoe-box-like as so many are.  It even came with an adorable bag!  So far, it's going well and I'm even enjoying practicing.  There are challenges with learning the many chords and the different rhythms but I'm enjoying it.  I find myself wanting to practice.  Wow!  Maybe, hopefully, I'll have a different answer someday to a question I'm often asked when people see my daughter masterfully play the harp...  "where does she get her talent?...do you or your husband play anything?"  My answer is usually...."um...I play the radio".  My daughter and I have a goal to eventually play "Somewhere Over the Rainbow" together (harp and ukulele).  We found a beautiful rendition of it on YouTube that gave me the last push I needed to buy my uke and go for it.


Maybe I should have made this post yesterday and called it "Wordy Wednesday".  lol  Now that it's all put together, I realize I could have made several posts.  Oh well.  It's done now.  I hope you enjoy it.  And, if you stuck it out to the end...thank you! :-)

Have a wonderful day!

Friday, August 25, 2017

Tiny Airedale

I finished up a project that has been in the works for quite some time.  A few years, actually.  It's a tiny, needle felted Airedale.  I'm not quite sure why I'd set it aside without finishing it but here she is.  my tiny, 3 1/2" little cutie...


I feel like she still needs something but I can't quite figure out what it is.  So, I've decided she's finished...unless I come up with any ideas on what might make her better.


A little red collar might be cute.


I love her ears and her adorable little behind.


I'm naming her Salsa after our dear, sweet Airedale that passed away recently.

This is number 34 in my create 52 challenge.

Thursday, August 24, 2017

Coachella Top

I've been knitting for years but haven't moved much beyond scarves, hats, and simple things.  Except an occasional pair of socks.  I've been wanting to venture into knitting clothing...sweaters, vests, tops, etc.  The fear of not understanding the pattern and spending lots of time on something that has a high likelihood of looking bad and/or not fitting has kept me from that venture.  Yeah....there was a vest years ago.  It was a simple pattern with v-neck and a cable down the front.  It was made with a double strand of yarn.  It was ok and I think I wore it once or twice.  But, I used yarn that pilled up really bad on the sides after only wearing it that little bit of time.  I made another vest years later that was actually looking great.  But, silly me, I noticed a couple spots along the v-neck ribbing that had holes.  They were small and I could have just stitched them closed from the inside and had a finished vest.  But, no....I felt the need to rip out the ribbing to learn what I did wrong and do it better.  It didn't work as planned and I couldn't get the ribbing knitted on a second time to look right...the count and other stuff kept going wonky.  The vest was a little large anyway and I ended up ripping it out.

I'm trying again to go for it but with baby steps.  I decided to try a tank top.  The one I decided on was a pattern I'd tried before.  It had gone well the first time but I'd made it a size or two too big and ripped it out.  I figured it would be a good pattern to use again since I'd had some success with it before.  I thought that if I got this one right and could actually wear it that it would be a great stepping stone to knitting more clothing.  

I did it!  Here it is...my Coachella top (a free pattern on Ravelry)... 


I love the back of it.


The pattern is basically a tube with a rolled edge on the top, two arm holes, and a little bit of shaping.  It calls for two sizes of needles.  I used size 6 and 8 circulars.  The smaller ones are for the rolled edge on top and for a rolled edge at the bottom.  I had to re-do the bottom of mine because the smaller needles and the twisted stitches used for the rolled edge made it too tight to fit and it didn't have any stretch.  I ripped back and made a 2x2 rib with the larger needles.  It fits fine now.  If I use this pattern again, I'll use the larger needles at the top too.  I think it will lay a little nicer that way.  I made mine in the x-small size.  I'm not sure how it will be if there's any shrinkage but it's fine now.  I normally wear size small tops but the small size of the pattern was too big last time.  I've read notes from other knitters on Ravelry that say it ran large for them too.


I got a little worried half way through that I might not have enough yarn.  I went to find more but couldn't.  Luckily, I was able to finish it with what I had.  There were just a couple yards left.  It took four balls of Sugar N Cream in the "Pebble Beach" colorway.  I love this color way SO much and I'm bummed that I can't find anymore.  It seems to have been a limited color but I sure wish they'd keep making it.  It's one of the prettiest colorways they've made.  At least I got some while it was in the store and enough to make something cool with it.

Friday, July 21, 2017

Tropical Blues

I just finished tucking in the ends of this gorgeous, turquoise, chunky throw.  I wish you could see it in person because the color is breathtaking!  It's hard to get it to turn out right in photos though.  The only way I was able to come close was by having warm tones of the table and the seashells in the photo.  The colors went all wonky whenever I tried to go in close without those things in the photo.  Oh well.  Close is better than nothing.  And, the seashells are perfect because the throw colors remind me of tropical seas.


This project started out as something completely different.  The original project only used one kind of yarn (with several strands held together) and was a knitted cable throw.  It was exciting to try out giant, size 50 needles.  However, I quickly lost my enthusiasm for several reasons....it went much slower than I'd anticipated with those giant needles; the giant knitted stitches/loops made it hard to figure out where I was what was what with the pattern; and those giant needles caused pain in my shoulder because of the exaggerated movements required to knit with them.  So, it sat in time out for a long time.  I eventually came to the conclusion that this would never get done.  I had no desire to work on it again.  And, I wasn't even excited about the throw pattern anymore.  So, I ripped it out a couple of weeks ago.


I decided that I really wanted to make another "5 1/2 Hour Throw" (that's the name of the free pattern on Ravelry but it takes longer than that to make).  I'd made several and really enjoy crocheting them.  I figured I had enough of the chunky yarn.  I just needed some accent colors to go with it.   I had some ideas in mind but came home with totally different yarn and colors than I'd planned on and I sure am glad I did!  They turned out to be a gorgeous combination!

The chunky yarn is Loops and Threads Charisma.  The other two are Caron Simply Soft in Pagoda (the dark teal) and Blue Mint (the turquoise).  The three strands are held together throughout the entire project.


Something happened that I found interesting.  I started two skeins of Caron Simply Soft at the same time but one ran out way before the other.  I wonder if one was way short of the yardage, the other way long, or ???


I love this throw!  It's my favorite color, it's beautiful, and it's super soft and squishy!

It didn't use up all of the yarn from the original project.  I still have several skeins left.  And, I have about 3/4 of a skein of each of the Simply Soft colors.  I did, however, get something out of it that I love.  That old project is no longer hanging hanging over me and waiting to be finished.  And, I have an idea of something to make with the leftovers.

This will be number 30 in my Create 52 Challenge. 

Wednesday, July 19, 2017

Re-fashioned Denim, Fun Fashion Finds, and Confidence

My mother-in-law went through her closet recently and pulled out a lot of stuff she wanted to get rid of.  She asked my daughter if she'd like to come over to see if there was anything she wanted.  My daughter and I both found several things that we brought home.  We've been busy re-making them into different, more current, fashionable clothing.

The first one I worked on was a long denim skirt.  It went almost down to my ankles.  I think it must have been from the 80's or 90's.  It's a high quality skirt and the top of it fit great.  So, I shortened it for a more current and stylish look.  It has nice deep pockets on the sides too.  I love that!  I even had thread that was the perfect color to match the faded yellow on the other parts.  Cool!


I wasn't quite sure about this dress.  It was a little funny.  But, I love denim so much!  And, I have a memory of a super cool denim dress I bought in the 90's that I ended up returning because I wasn't sure I'd be brave enough to wear the very fitted style that it was.  This dress is different but there was something about it that reminded me of that one.  So, I had to go for it.  Oh, and a cool side note...not only is it great to be up-cycling old clothing but this dress was made in the USA!

Oh that ruffle!  And, the raw, frayed edge!  Oy!  lol


I removed the ruffle.  It turned out that the edge that was left was already surged.  That was nice.  All I had to do was fold it over and stitch it down.  I wasn't quite sure if the tapered look would work or if a hem on the thick denim would even hang right.  But, I think it works.  As far as the top goes, I opted to just cover it up.  It fits funny at the top and there's a tiny hole in the middle that looks like it might have had a flower or something attached at one time.  I have plenty of scarves and shawls and several of them looked great.  I went with a more summery one for the pics.

Oh, and pics!  Yikes!  I've been working at being braver to post pics of myself.  I've gotten better.  It's still weird though and uncomfortable even having my daughter take pics of me.  But, I went for it and got a few I'm fairly happy with it.  I'm not going to let myself wimp out on posting these!  So, here it is....my new, up-cycled, re-fashioned dress...


I've been working on being braver with fashion.  There are looks that I love but I tend to go safe.  My usual way of dressing is jeans and casual shirts.  I'm doing better.  So, now, I'm trying to be even braver and trying not to worry about parts of my body showing....like my legs.  I've been wearing shorts all summer and even some skirts!


I found these awesome boots a few weeks ago at a thrift shop.  I love them!  So, I got them and I'm determined to be brave enough to wear them.  And, now I have an outfit that goes with them.  So, no excuses, right?!  Gulp!


I hit the shoe jackpot the day I found these!  They were only $5!  They're leather and in great shape.  I looked up the brand online and found out that these boots were over $100 when they were brand new!  These look like they've barely been worn.  And, for heels, they're actually pretty comfortable.


I found two other pairs of shoes that day for just $4 for each pair.  They're in great shape and look like they've barely been worn too.  Those who've seen them think they're high dollar too.  I'm still working on finding outfits for them.  


They're definitely beyond what I normally wear but I love them.  So, that's a perfect reason to be braver and bolder to get to a place where I can wear things like this that I love!

How do you all feel about fashion?  Do you stay in a safe zone with what you normally wear?  Do you see things you love but aren't sure you could do it?  Do you worry about an imperfect body like I do?  Are you nervous about trying to be more stylish or letting parts of you show?   I'd love to hear how others feel about this.

I've always been SO self conscious about my skinny bird legs.  As I've been working lately on being OK with me, I've noticed that there are beautiful people out there with skinny legs.  The difference seems to be confidence.  That's what I'm attempting to have!  I'm trying to love what I've been given and make the best of it.  And, besides, I'll never be as young as I am today!  So, why keep waiting?!  Watch out world, here I come!  Gulp!

Tuesday, July 18, 2017

Scrabble Markers

I finally got around to finishing up another project that had been in the works and waiting to be done for quite a while.  I made Scrabble tile crochet markers.  They are letters that correspond with crochet hook sizes.  When I start a project, I simply place the hook size marker on my project.  Then, there are no worries about losing my hook and not knowing what size I was using.


I collected letters of sizes I use most often and a few others.  There are several of each of the more commonly used sizes.  I used a few different sizes of clips for different thicknesses of yarn.  And, they store nicely on a ring to keep them all together.

I'm not sure if I'd seen some like these already made up or if I got the idea from other things made with Scrabble tiles.  Either way, I started searching for and collecting Scrabble tiles a few years ago for this project.  


Hubby helped me build a tiny jig to put the tiles in one by one to drill and get all the holes in exactly the same spot.  It was fun using the drill press!


It'll be nice using these and not worrying quite so much about my hook getting separated from my project or setting it down next to another hook only to forget which one I was using.

Yay!  Another project completed that's been in the works.  And, another project for my Create 52 challenge.  This one makes number 28 and keeps me caught up.

Saturday, July 15, 2017

My New Wheel

I've wanted a double treadle spinning wheel for a long time now.  And, I've wanted a wheel that is more portable than the Ashford Traditional and the Country Craftsman wheels that I have.  I just couldn't justify buying one since I had two wheels that worked just fine.  However, when my Traditional wheel broke a few months ago, I felt it was time.

I was loading it up in my car and heading to Tucson to see my daughter.  I was planning to take some private spinning lessons from someone I'd met there.  When I got to my Tucson and took it out of the car, a big section of it fell off...the part with the uprights, the bobbin, etc.  A piece of wood that attaches it all to the wheel had snapped in half along the grain line of the wood.  I have a feeling it's not meant to be transported a lot...even though I try to be very gentle with it.  However, most of the spinning I do is when I'm meeting up with other spinners somewhere other than home.

That was a perfect time for it to break though because there's a yarn shop in Tucson called Grandma's Spinning Wheel.  Which, as you might guess, sells spinning wheels.  I paid them a few visits to test out the many wheels they carry.  I'd dreamt for years about getting an Ashford Joy wheel.  I love the idea of how they fold up and fit into a handy carrying case.  However, when I had the opportunity to test it out, I really didn't like it.  I also couldn't justify the high price for a wheel that seemed so delicate.  I ended up falling in love with the Ashford Kiwi.  I had fallen in love with a Kiwi years ago when I tried one out but to like this wheel over all the other high dollar ones was surprising.  A very nice surprise!  The cost was about half.

I ordered one that was unfinished to save a little more money.  And, I thought it would be nice to personalize it.  I had grand ideas of painting beautiful things on it and lots of bright happy colors.  I decided against doing that when I imagined all of that flashing at me as the wheel spun round and round.  So, I went for a simpler design...I painted the wheel in my favorite color and gave the rest a subtle stain with a satin finish.  I'm very happy with the results.  I think it's beautiful!


I have to admit that there were many times I'd wished I'd splurged on a finished version.  I don't enjoy sanding and I was worried that the stain wouldn't work out or that the whole thing wouldn't turn out nice.  Luckily, my hubby loves to sand, stain, paint, and finish things like this and he was more than happy to help out.  In fact, he did a lot more work on it than I did.  But, it was a lot of fun working on it together with the stain and then putting it together.

There were a lot of parts!  And, this picture doesn't even show the bag of hardware for putting it all together!


Since my new wheel is my favorite color, it made sense to have my first bit of spinning on it be in that color as well!


I'll post a pic of the yarn when I get some done.  I've had a crazy, vertigo, sinus thing going on for most of the week that's prevented me from doing much of anything.  I'm hoping to get back at it now that I'm starting to feel a bit more normal.